Elle was one tired little lady when she came to our house to play this week. She and her sister had friends over to spend the night, and they stayed up very late. She yawned all through the reading of the recipe. Did I mention that she is an excellent reader? Anyway, I thought a jaunt down to the raised bed garden to pick the lavender might wake her up.
 She continued to yawn through the mixing and measuring, but when I told her some of the things I had planned for us while the bread was baking, she perked up a bit. By the time this bread was out of the oven, she was going strong. Here is a picture of the finished product and a recipe just in case you are intrigued by cooking with flowers, as I am.

Lavender Tea Bread
Ingredients:
3/4 cup milk 2 eggs
3 T. finely chopped lavender 2 cups flour
6 T. softened butter 1& 1/2 t. baking powder
1 cup sugar dash of salt
Directions:
Preheat oven to 325. Grease and flour a 9×5 loaf pan.
Combine milk and lavender in a small saucepan. Heat to a simmer then remove from heat and allow to cool slightly.
In a medium bowl, cream together sugar and butter until smooth. Add eggs and beat until mixture is smooth.
Combine flour, baking powder, and salt. Stir dry ingredients alternately with the lavender/milk mixture into the creamed mixture. Stir until just blended. Do not over stir. Pour into prepared pan and bake 50 minutes or until wooden pick comes out clean. Cool slightly and remove to wire rack to glaze.
Glaze:
My original recipe did not include a glaze, but I always add one. My preference is an anise glaze using 1/2 cup sugar, 1/4 cup water, 3 star anise, and a vanilla pod cut in half. Boil all ingredients for 10 minutes, strain, and pour over bread. I wasn’t sure Elle would appreciate the anise flavor, so we made a simple almond glaze, instead, that consisted of a cup of powdered sugar, 3 T. milk, and 2 t. almond flavoring whisked until smooth and poured over the loaf of bread.
You’ll notice in the picture, Elle is snipping lavender leaves. Earlier, I had snipped the buds and dried them a bit for use in this recipe. I like using the flowering parts, but I will forewarn you. The buds look like bugs in the bread. We served this to company once with the buds in it and they swore it was a bug. Seriously, the little shoots on the buds look like tiny insect legs. But, Elle didn’t seem to mind at all. And that leads me to our next project. Worm painting. What’s a little bug looking thing when you are going to handle long, slimy, night crawlers? The worms do the original art form, and the artist outlines the form with rainbow crayon lines. And, animal lovers united, don’t “squirm” at this project. Since it is done with food coloring, there is absolutely no harm done to the worms. In fact, these are the lucky worms. They are going to get to work in our garden rather than on the end of a fishhook. 🙂

I’m so sorry I didn’t get a picture of the finished piece. Elle’s excitement was building in anticipation of our next challenge; planning pranks. Our son, Elle’s stepfather, is such a joker. Saint has a repertoire of stories about Kris’ antics from his childhood to present day. So, you can imagine that Elle has been the recipient of a few of his tricks and was eager to reciprocate. We had a series of things we practiced…some worked and some did not. This untied balloon tucked inside the door went flying and surprised her mom as she walked through the door, but the bloody tooth, which I thought looked very realistic, did not phase either of them. Neither did the “fake” pillow Elle made by removing the real pillow from a pillowcase and replacing it with plastic bags so that the head would go directly to the floor. I should have told her how hard headed her step dad is. She will learn soon enough. 😉 And beware, Shannon and Kris, there are more tricks up her sleeve. You will never know when to expect them.
We mixed in a little more science. In addition to looking on the internet for facts about worms, we played with chemical reactions.
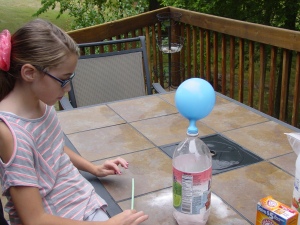
Folding a paper towel around a few tablespoons of baking soda, dropping it into a ziplock bag containing a cup of vinegar and a fourth of a cup of warm water, quickly zipping the bag, and giving it a shake or two gave us a nice reaction by inflating both the bag and the balloon, but we had expected the bag to burst. No big bang fireworks, here. I think I used a sturdy zipper freezer bag and should have opted for the cheap dollar store kind. We’ll try again sometime.

I had pinned a recipe for “unbreakable bubbles” that I had serious doubts about but wanted to try. I do love bubbles. Elle didn’t think she loved bubbles all that much, but she sure had fun. These were NOT unbreakable, but they were much stronger, larger, and more colorful than the kind you buy at the store. You can find the recipe here: http://media-cache-ak3.pinimg.com/originals/ed/cd/d1/edcdd10ef29fd2a061686cd7edadfcd7.jpg
I have another bubble recipe using gelatin that we will try one day soon.

Hope you can use some of these ideas with your grands or bonuses. I sure had fun, and when the grown-ups came to pick her up, Elle was not yawning one bit. In fact, she entertained us with her gymnastic and dance moves until I might have seen a few yawns from the adults. Not me, of course.


