For the Birds

While this post has little nothing to do with birds, it does connect indirectly in that chickens are birds, and I had my first real experience with chicken wire, today. I have seen it used in tons of projects and just thought I needed to have some around. Every time Saint  goes out for something, he always asks, “Is there anything you need?” Of course, he expects me to say no, but for the last few weeks I have been saying, “Chicken wire.”

Lo and behold, one day he came home with chicken wire. I thought it might come in sheets or panels, but no. It came in this giant roll.

Image

It’s a little bit flat out intimidating. So, I did not use it for quite some time, but the hot, hot weather here has driven me right past fall and into dreaming of a white Christmas. My searches at garage sales and thrift stores have yielded an entire closet full of Christmas junk treasures. I faced a dilemma; make something or throw some of it away.

For two dollars, I had purchased a square thingy with gold leaves all around it. At another yard sale, I bought a little ring of glass beads. I’m working on some much larger pieces that require paint and stain, and I thought I might use these as accents, but the tones didn’t match. I decided to put the two together to make a wreath or door hanging, and it would require putting the chicken wire on back. (You thought I had forgotten about that, didn’t you?) That’s how I came to the title of this post. That chicken wire is for the birds! First, you can’t cut it with scissors. Well, you can, but then you have to buy new scissors. This required a trip to Saint’s old Craftsman tool box for the wire cutters.

Image

Several band aids later, I have this little piece of wire and no fingernails. The good thing is, those spiky things make it really easy to attach to other things.

Now I had a square of gold leaves with a circle of gold beads, and nothing in the middle. Until…I remembered a project from last Christmas. Paper flowers are all over Pinterest, now, but these made out of brown bags are my favorites, and it was perfect for the center of my wreath.

Image

Looks pretty nifty for a thrifty three bucks, wouldn’t you say? Here it is hanging on my door.

Image

Maybe with a little greenery? Or maybe it’s the 102 degree temperature. Actually, I think it is just not right with my door color, but I’ll bet it will look absolutely amazing with the other Christmas things I’m working on for the flea market booth. I’m planning an awesome Christmas display, and I can’t wait to show it to you in November.

Ugly Door Reveal Part 1

Image

Remember ugly door? I took it off this lovely antique piece that I re-purposed for my flea market booth.

Image

And I gave it a good coat of primer.

Image

And then I got side tracked and had to put my paintbrush in the baggie,(see earlier post) and it worked, but, note to self…it won’t stay moist forever in there. I had a hard time cleaning it when I went back 3 days later. That’s when I resumed work on the ugly door project. I spray painted the handles that I had removed. Since I had two doors, I had two handles, which is just what I needed for ugly door # 1. I did a final coat of enamel paint around the edges of the door and let it dry. Then I used some leftover chalkboard paint from the little child’s table that I featured earlier and sold at my booth right away. I coated the inside panel of the door with chalkboard paint. It took three coats to cover. After the final coat had dried for a few days, I seasoned the chalkboard surface by rubbing it down with a layer of chalk. You know, like you did when you were a kid. Turned the chalk sideways and “painted” the whole thing. When I erased it, it looked authentically like an old chalkboard. I showed Saint exactly where I wanted the handles attached and he did them perfectly, like any good saint would do. I initially intended to chip it up a little by distressing and sanding, but I really liked the black/white contrast. Instead, I tied some black and white polka dot ribbon onto the handles and called it good.
Drum roll, please. Dum de dum dum………..

Image

Here it is! A cute, little cheese tray. Now wouldn’t that make the sweetest addition to your party table? If you don’t have parties, just attach it to the wall as a message board.

I know, right? An amazing transformation, but to be honest, this is not my favorite ugly door project. I can’t wait to show the next one to you, but I am in search of the final touches. I’ll give you a little preview peek.

Image

Can you guess?

More photos of ugly door #1

Image

Image


Another “piece of cake” recipe

If I had followers, at this point, I would apologize because I promised the reveal of the ugly door project, and I have not posted it. It is coming, I promise. In fact, I have two surprises instead of just one. Until then, I made another easy recipe I thought I’d share because, well, I practically deleted my entire blog changing one letter that I printed wrong in the URL address. It is randoM, not randoN, and now all the things I pinned to Pinterest won’t link back here. So, suffice it to say, I need the practice. Posting and publishing, that is. So here goes.

This recipe is not quite as easy as the Lime pie, but almost. I needed to make a dessert for our Saturday night card game…a weekly tradition established years ago with our best friends and neighbors. It needed to be something quick and easy that I could make from ingredients on hand because I was covered with paint from the ugly door project. I thought I’d make a cherry dump cake, but I didn’t have crushed pineapple and didn’t think fresh would work so well. I searched my Pinterest board for something and found some Peachy Keen bars from Just a Pinch, but I didn’t have a can of peaches. I decided to combine the two ideas and see what came out. I’m lazy creative resourceful, like that. I don’t know what to call it, but the ingredients I used are:

sugar free white cake mix

no sugar added Wilderness Cherry Pie Filling

2 eggs (one for the mix and one for the filling)

1/3 cup Splenda

1/3 cup butter-softened

8 oz cream cheese-softened

1 tsp burnt sugar flavoring (almond would work equally well if you don’t have the other)

1/3 cup sliced almonds

Image

Preheat oven to 350 and spray a baking dish with butter flavored spray and set aside. I used a slightly smaller than 9×13 and that worked very well.

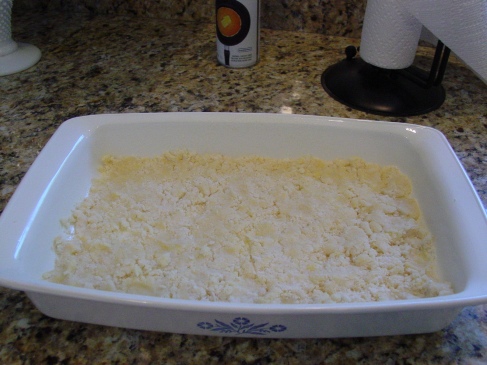
Mix the cake mix, softened butter, and one egg until crumbly. Set aside 1 1/4 cups. Press the remainder of the mixture in the bottom of baking dish and bake for 10 minutes.

Image

In the meantime, Mix the cream cheese, Splenda, and flavoring until creamy. Remove the “crust” from the oven and spread a can of cherry pie filling across it. (It does not have to cool first.) Then spread the cream cheese mixture on top of that. Crumble the remaining cake mix mixture over this and sprinkle the almonds on top.

Image

Return to oven and finish baking for 30 minutes.

This is really good served warm with ice cream. I wish I had toasted my almonds before adding them as they did not get as smoky and crunchy as I like. Other than that, It came out great and I think I will call it Cherry Almond Delight.

Image

Image


Enjoy!

Oh, Baby!

When I got the news that my adorable niece, Terri, was pregnant, I immediately started thinking about the shower. . .after I did my happy dance and some shoutin’, of course. And who better to help organize a baby shower than Terri’s sister, Carin, my equally gorgeous niece whose job includes event planning for the alumni association at Mizzou?

Terri and her husband, Matt, love to travel. They spent a summer  touring Australia and another living in Ireland. Last year they returned to Europe for a friend’s wedding. But, let’s just say their frequent flyer miles have come to a screeching halt been put on hold for a few  nine months.

Both Carin and I agreed that a travel theme would be appropriate, and since Terri is an elementary teacher and book lover, what could be a better starting point than Dr. Seuss’ Oh, the Places You’ll Go?

Image

I began searching my own collection of vintage transportation items as well as glass serving pieces and then hit the flea markets for accessories. I found the perfect antique ship and a life preserver. Carin started the search for some vintage invitations and scored some cute party games and food tent labels to match. Here are some of the things we came up with:

Image

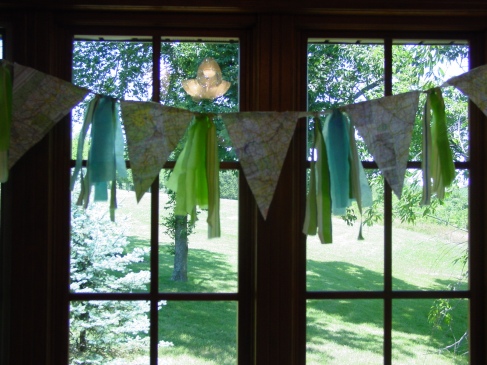
A bunting made with old map pages, torn fabric streamers, and tissue paper attached to twine roping.

Image

A welcome wreath for the front door made from a vintage frame covered with burlap, the flea market life preserver, and  the sign made from sailors’ rope and scrapbook paper saying, “AHOY! IT’S A BOY!

Image

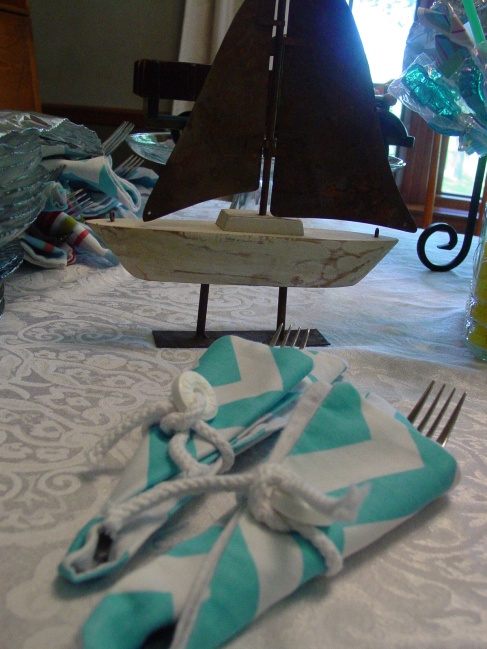
We made these napkins out of flannel lined fabric so that they could be used as burp cloths after the shower. The nautical rope and candy life preserver  saver tied in nicely with the travel theme, and the antique ship with rusty sails added to the vintage feel.

Image

These miniature suitcases left at the baggage claim area for guests to pick up held the shower favors…tiny candy airplanes made from gum and lifesavers. The luggage tag attached to the suitcase announced the name of the baby and the ETA (expected time of arrival.)

Image

An antique truck (in the background) held vegetables and dip, and a vintage Kraft train surrounded the punch bowl and guacamole dip and chips.  Decorated sugar cookies, candy dipped pretzels, and rocking horse suckers  played up the center display which included three different kinds of homemade cupcakes (recipes to come in a later post.)

Image

I borrowed this old Radio Flyer wagon from my best friend. It carried around her children and now, her grandchildren, and it worked perfectly to add more “wheels” to the theme and hold the gifts that guests brought in.

A burlap bunting reinforcing our theme and a few vintage baby things, including a musical carriage that Saint brought to us in the hospital the day our daughter, Tiffany, was born, finished the gift area.

Image

Carin did such a wonderful job with the hostess duties, making everyone feel welcome and instructing guests in playing the advice to the new mom game. (I told you she was gorgeous, didn’t I?) But, secretly, it was her daughter who stole the show.

Image

It was a fun time, followed by a family cookout where the men were allowed. And here she is; the mother-to-be.

Yep! She’s just about ready to go! “Oh the Places They’ll Go!”

Margarita Lime Pie

I’m skeptical when I hear, “easy as pie.” I have mastered cookie, cakes, cupcakes, and some candies, but pie crusts are not in my portfolio. That’s why Mrs. Smith exists! But, when I tell you this recipe is easy as pie, I really mean it is a “piece of cake.” Yep, that easy!

I first got this recipe from my SIL because it’s a sugar-free recipe, and I’m always looking for those. The original recipe calls for a packet of Crystal Lite lemonade mix. I just changed it up a little.

Image

And the next-to-best part is: This is all you need.

Margarita Lime Pie

2 small boxes Jello Instant Vanilla Pudding mix

3 1/2 cups low fat milk

1 package Great Value Lime Margarita drink mix

1 tub of Cool Whip (8 oz)

Directions: Combine pudding mix and milk. Beat until smooth and slightly thickened. Place in refrigerator for just a few minutes to further thicken. Then stir in the drink mix and the Cool Whip. Pour mixture into 2 (Yes! It actually makes 2 pies) graham cracker pie crusts and refrigerate. This is what you get.

Image

I sprinkled a little lime zest over the top just for presentation.

Image

And this is what you get. Yummy.

Easy as pie! I promise.


If you remember…

If you remember, in a previous post, I mentioned ugly oak doors that had been attached to a beautiful antique piece. Now who would do such a thing? Well, somebody did, and I have the picture to prove it!

Image
And, as promised, I am going to repurpose this thing. I have already removed the brass handles and painted them black, using RustOleum flat black stick to everything paint. Great stuff!

I have also painted a coat of primer-Zinsser Bull’s Eye.Image Which brings me to the purpose of this post. And you are going to thank me later.

I recently read a tip and thought I’d give it a try, today. You see, the way I usually clean up a paintbrush is soak wash throw it away. But since I’ve been doing so many projects lately, Saint suggested buying a few good brushes and cleaning them really well. To his specifications. Which translates to him cleaning them because I never meet those specifications. The tip said I could avoid a clean up between every coat of paint by placing the used brush, paint and all (which is exactly how I throw them away) into a baggie and sealing around it. I tried it. IT REALLY DOES WORK! Since I needed to wait a couple of hours between coats…really longer, but I am impatient and it is an extremely hot day, thus drying time should be reduced, right? Anyway, I put the brush in, and since I was using a water based primer, I added a damp, crumpled up paper towel, and sure enough. When I went back to use it, it was not hard as a rock. No, it was nice and supple and ready to paint on the second coat.  That’s all there is to it! ImageOh, and you are welcome.

Did I tell you …

Did I tell you that I dislike hate abhor hot weather? Here in Southwest Missouri, we have had record temperatures for weeks. The grass crunches under foot like August, and it is only early July. Leaves would be weeping if they could gather up the tears. A short jaunt to the garden or out to water plants calls for another shower and shampoo. The only thing that glistens on me is newly applied sunscreen, and that only lasts a few minutes; I sweat.

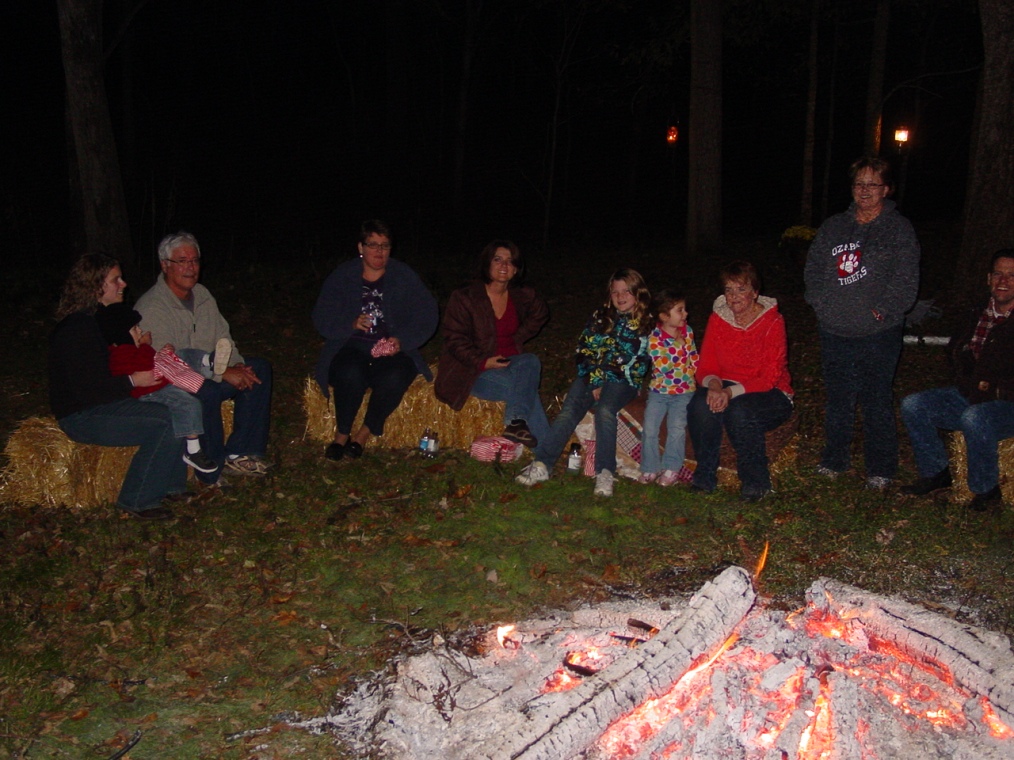
Sporting events, camping trips, shopping…all are cast aside as I babysit my air-conditioner and a glass of iced tea. Pinterest, take me away! I’ve started a new board called Fall Follies. I’m already in the planning stages of a fall vacation and a fall bonfire. Dreaming of star filled nights, smoke filled air, and s’more filled mouths. So this reminded me of last years neighborhood gathering, and I thought I’d share the pictures and ideas with you. And since I’m a flea market junkie, I’ll show you how I put this together on the cheap!

Image

We are blessed to have this beautiful valley below our house and even more fortunate to have wonderful neighbors to share it with.

I happened to have two vintage doors that I was getting ready for my flea market booth. Saint loaded them and the saw horses up in the old ancient truck we use to roam around our acreage. Presto-chango! Our fall table base. I had saved rescued a slab of bark from a dying elm tree, which served as a great table runner. It added just the right amount of texture and cost absolutely nothing. I gathered up some of the fall things I had picked up at garage sales and other flea markets and started putting things together.

Image

A little leftover orange lace, some burlap, and a few Halloweenish accessories dressed the table nicely. Notice how I repurposed a teak wood corn on the cob set into a S’mores station?

All the baskets are flea market finds, as well as the vintage bowl that holds the beverages; recycled water bottles filled with pond water (chocolate milk) and swamp water (limeade) labeled with free printables. Gummy creatures added.

Image

The puking pumpkin idea was from Pinterest, and I will share the dip recipe that I used at the end of this post. It was a big hit. We kept the menu simple: Hot dogs to roast, chips, mini chili bread bowls, individual Snickers cheesecakes, S’mores, popcorn and candy.

The most wonderful part of the evening was watching the eyes of our little guests when they saw the bonfire Saint built. “Big fire!” This little one declared.

Image

Image

I can’t wait until this heat gives way to crisp evenings with falling leaves and pumpkins. For now, I’ll have to be content to start planning this year’s fall bonfire and be thankful for my air conditioner and iced tea!

Image

Puking Pumpkin Dip (AKA Bacon Cheddar Dip)

Cheddar Bacon Dip 16 oz sour cream 1 packet Ranch dressing mix 3 oz bacon bits (in the bag not jar) 1 cup shredded cheddar cheese Mix together and refrigerate 24 hours. Serve with chips and/or veggies.

Enjoy, and stay cool!

Something for Nothing!

I bought these two end tables sight unseen from Craigs’ List. Well, there was a remote picture, and I figured I couldn’t go wrong. Two for ten bucks. The Garage Sale Saint met the owner and brought them home. In pieces. The legs that were attached pointed in all different directions. Mistake!  In the remote picture, it looked like they had good bones. In reality, I think I rescued them from the bone pile. Image

I hate to throw anything away, so Saint added some sawdust and glue to the screw holes and tightened the legs up. I doused it with a coat of black paint. Bore-ing! Since it is probably not a vintage piece, I was not afraid to try something a little bolder. I’ve been seeing a lot of turquoise and peacock blue on blogs, lately, so I picked up a can of Rustoleum and went to town. That’s what my grandma used to say when she meant “got busy” because I literally went to town to get the paint before I “got busy.” That helped. Some.

Image

Notice how professional I am, spraying directly on the grass behind our house. A ten dollar investment will give you that attitude sometimes.

This was not the look I imagined, but I knew what I needed, and I didn’t even have to go to town. I had a brown glaze already mixed up, so I painted it on, being very generous in the grooves, and did a quick wipe down. I was beginning to like the look.

The tables had originally housed a glass insert which, the owner quickly disclosed, had been replaced with a thin sheet of plywood. In my mind’s browser, I remembered seeing a semi circular table with the top covered in an animal print fabric. This was a very high end piece of furniture and I never hoped to achieve that look, but it offered a solution. A half yard of zebra print for $4.00 did the trick. I used a spray clear adhesive, some tacky glue, and a few unseen staples to adhere it to the “original” plywood.

Boom! Here it is, all ready to add a pop of color to a college apartment or dorm room or hold a lovely book and beverage on the deck or at a lake house. Image

A little something for nothing. Practically nothing.